- Let’s start steps for Connect Databse in Barcode Print .
Step 1
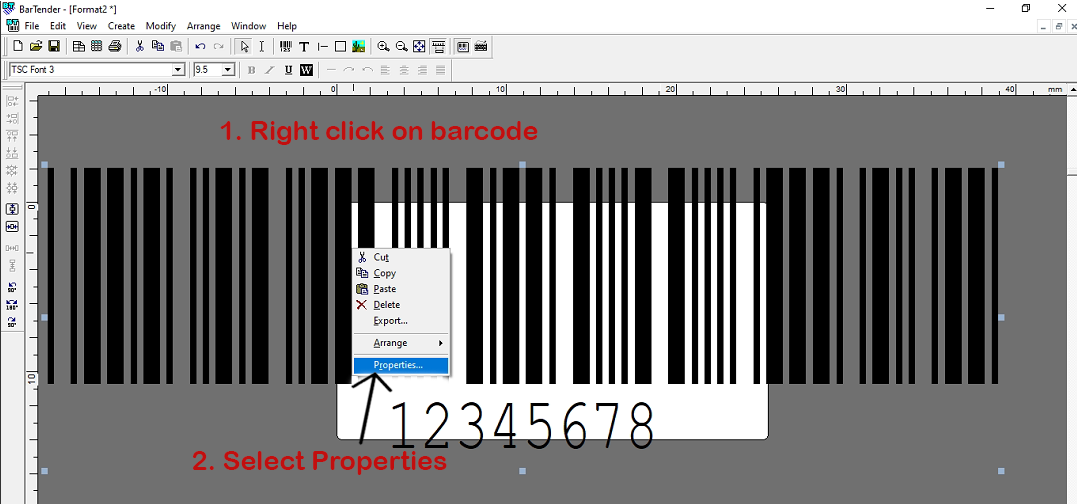
- First of all open the software and Create Barcode Print.
- Now Right Click Barcode and go to Properties.
Step 2
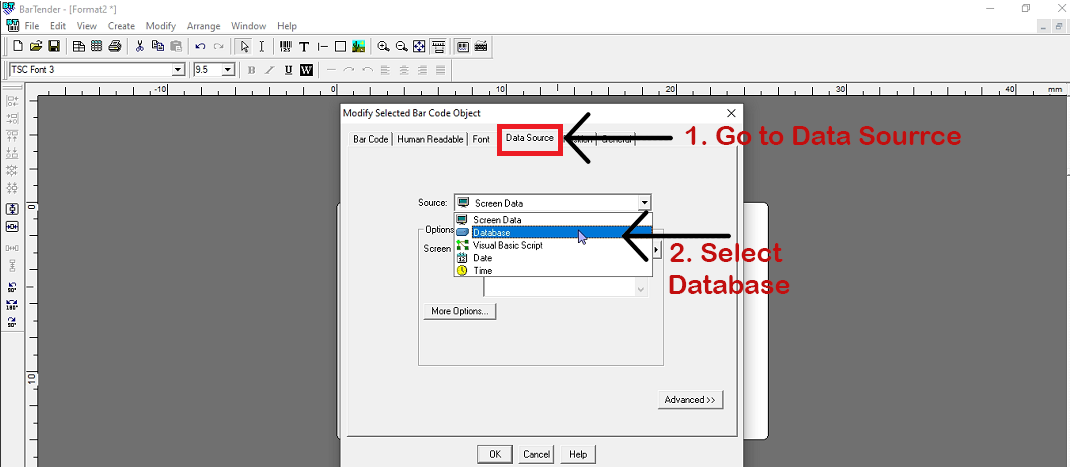
- It will open the Modify selected Barcode object window.
- Go to Data Source.
- Next , Select Databse
Step 3
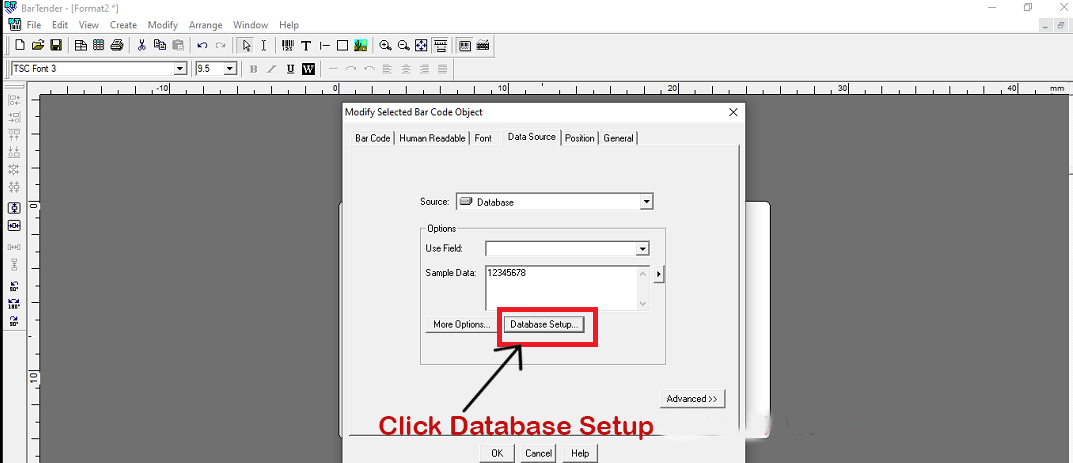
- Next , You Go to Databse Setup.
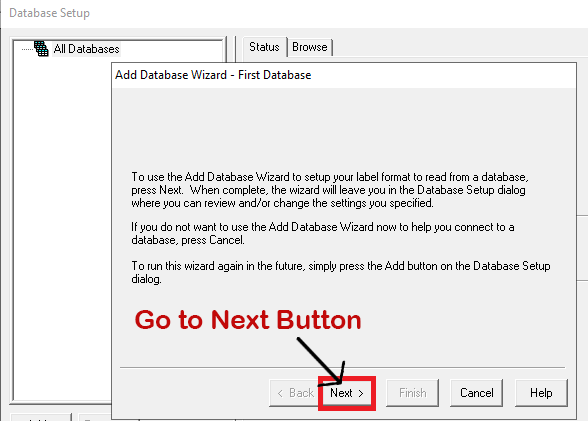
- Select Next Button.
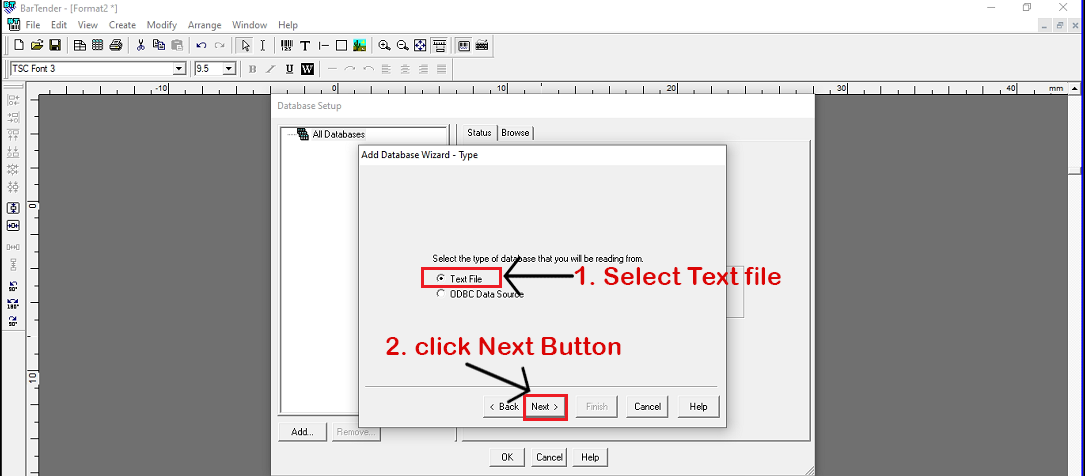
Step 4
- Now, Select Text File.
- Click Next Button.
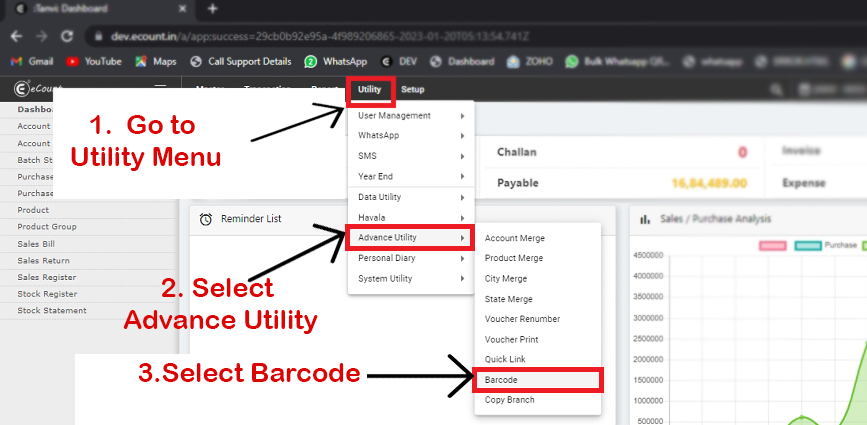
Step 5
- Now , Open eCount Software.
- Next , Go to Utility Menu -> Advance Utility -> Barcode .
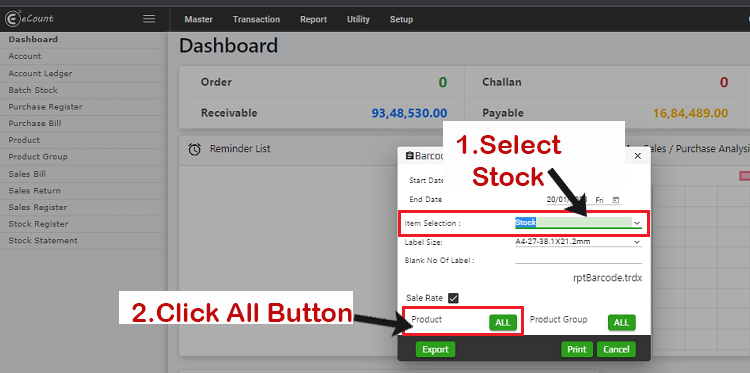
step 6
- Select Stock.
- Click All .
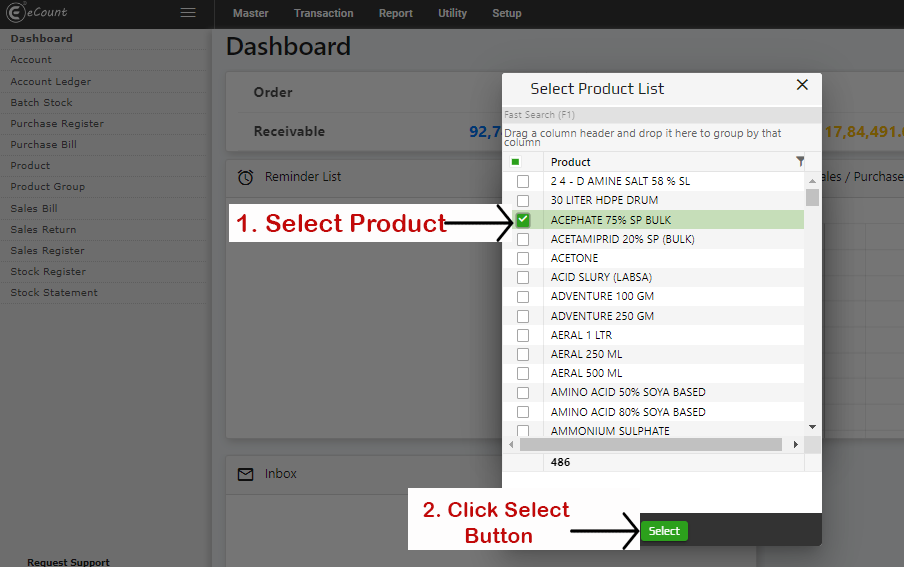
Step 7
- Now, Select what you want Product.
- Next , Click Select Button.
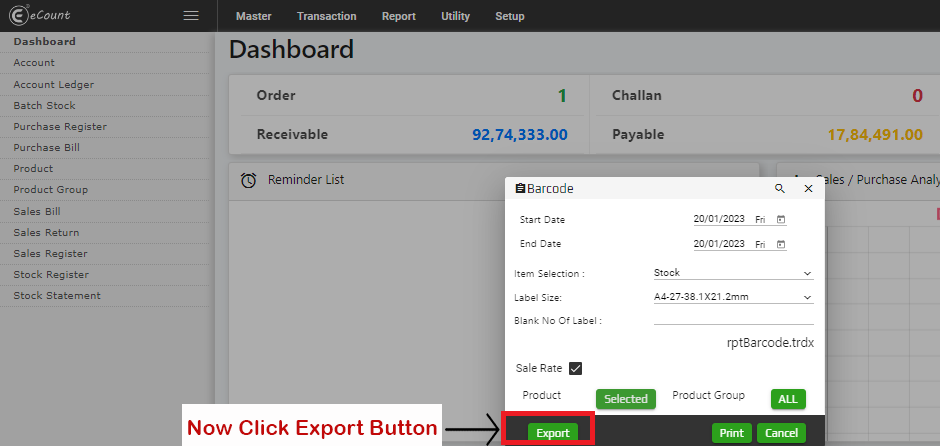
Step 8
- Click Export Button.
Step 9
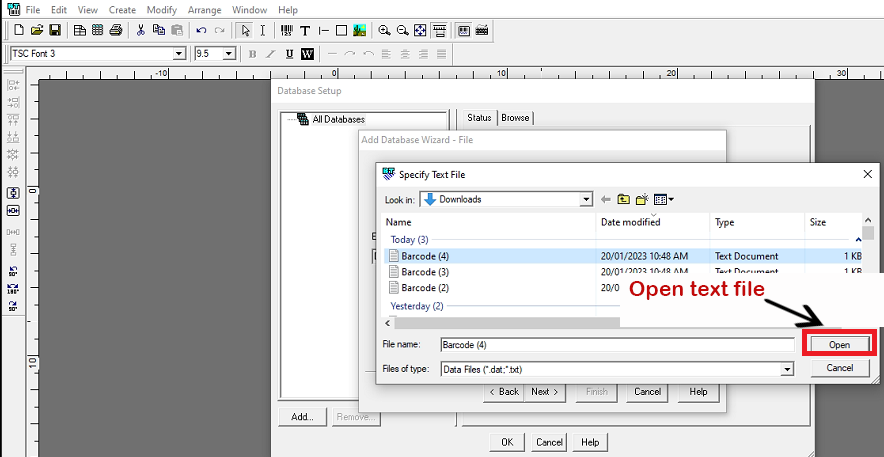
- Now, Successfully Download Text File.
- Next , Go to Bartender Software and Open Text File.
- Click Next -> Next .
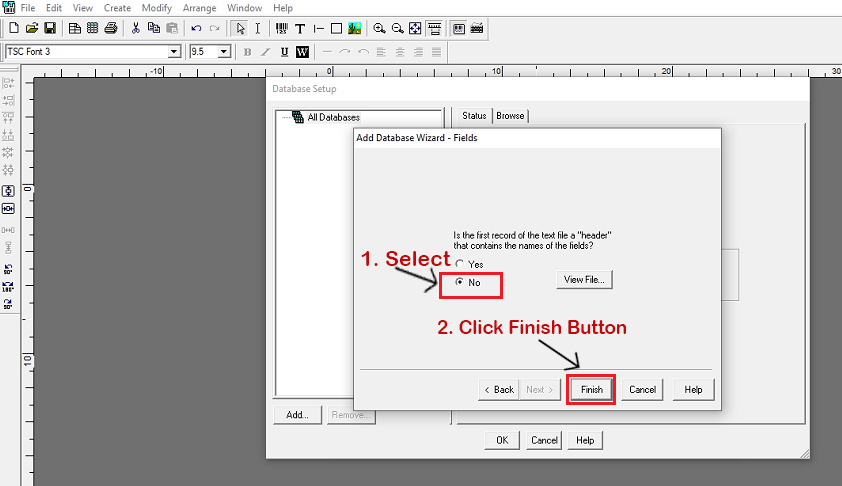
Step 10
- Now, Select No.
- Click Finish Button.
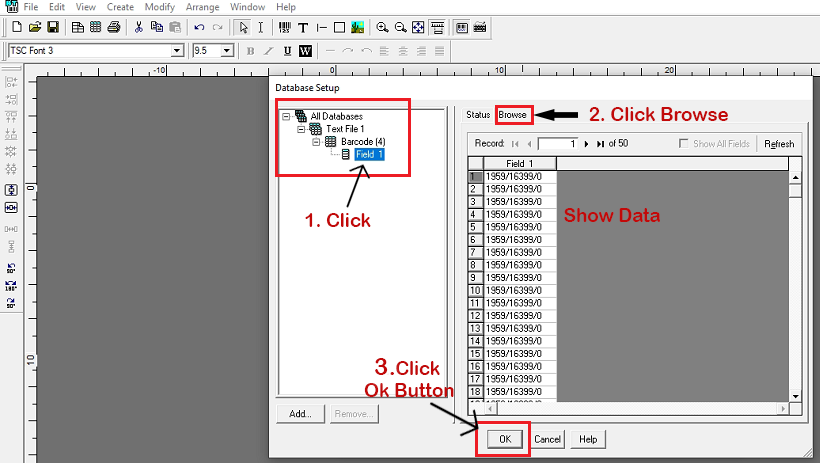
Step 11
- Now, Select Database.
- Click Browse and show your data.
- Click Ok Button.
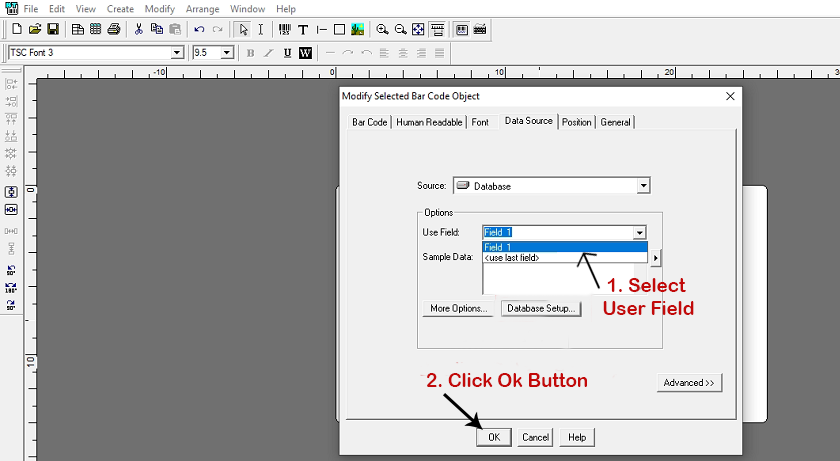
Step 12
- Now, Go to Data Souce and Select Database.
- Click Ok Button.
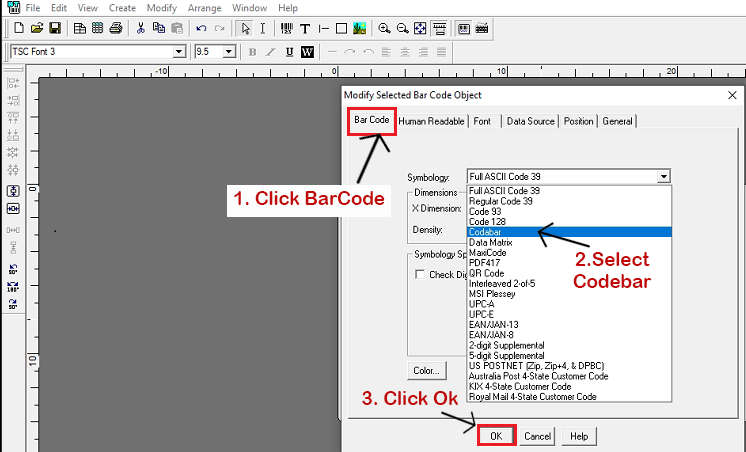
Step 13
- Now, Go to Barcode.
- Select Symbology -> Select Codebar.
- Click Ok Button.
Step 14
- Now, Your Database is Successfully Connected..
- Go to File Menu -> Print.
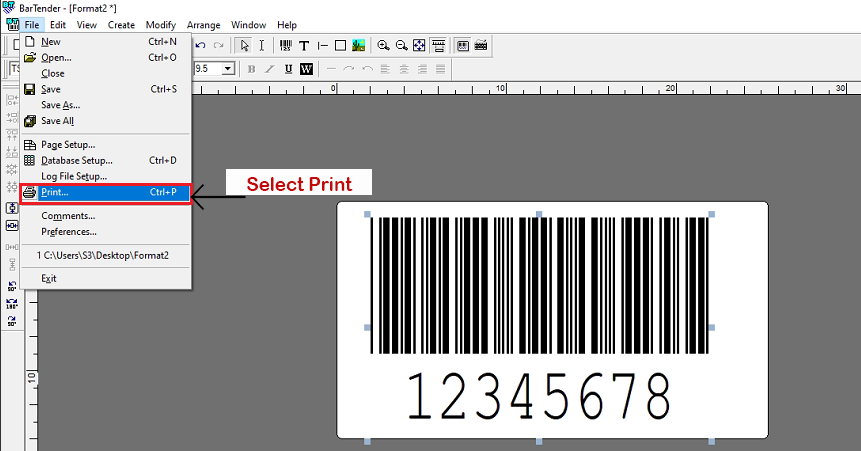
- Now , Successfully Print Barcode.