This article shows how to set up grouping in an ecount print file, helping you organize report data by groups.
📋 Overview
Grouping groups rows that share the same key, allowing you to display a header and footer for each group. Use it when you need to summarize or separate data by categories such as customer, product, or period.
🔧 Steps / How-to
- Open the print file designer and click Add New Group. This creates a
groupHeaderSection.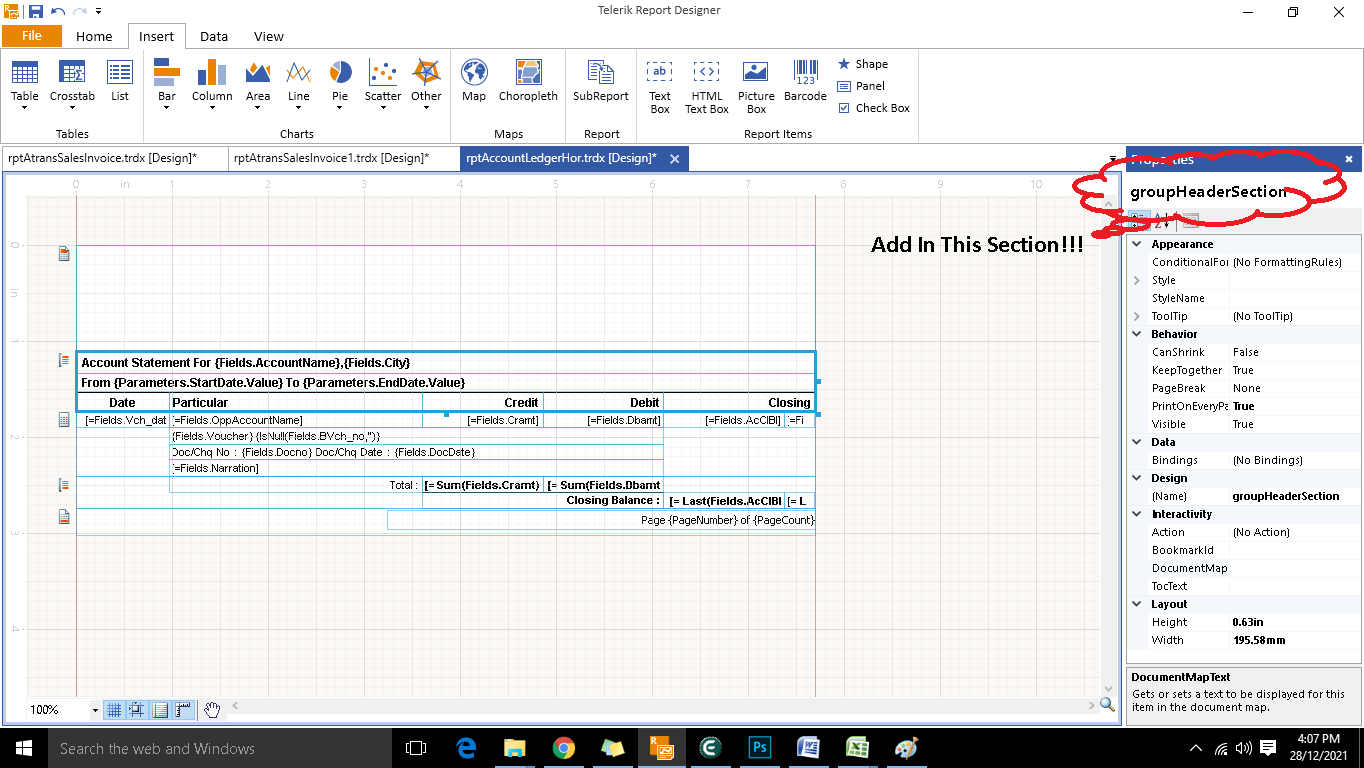
- In the
groupHeaderSection, enter the header text you want to appear at the start of each group. - After the header, add a
groupFooterSectionfor the group’s closing details.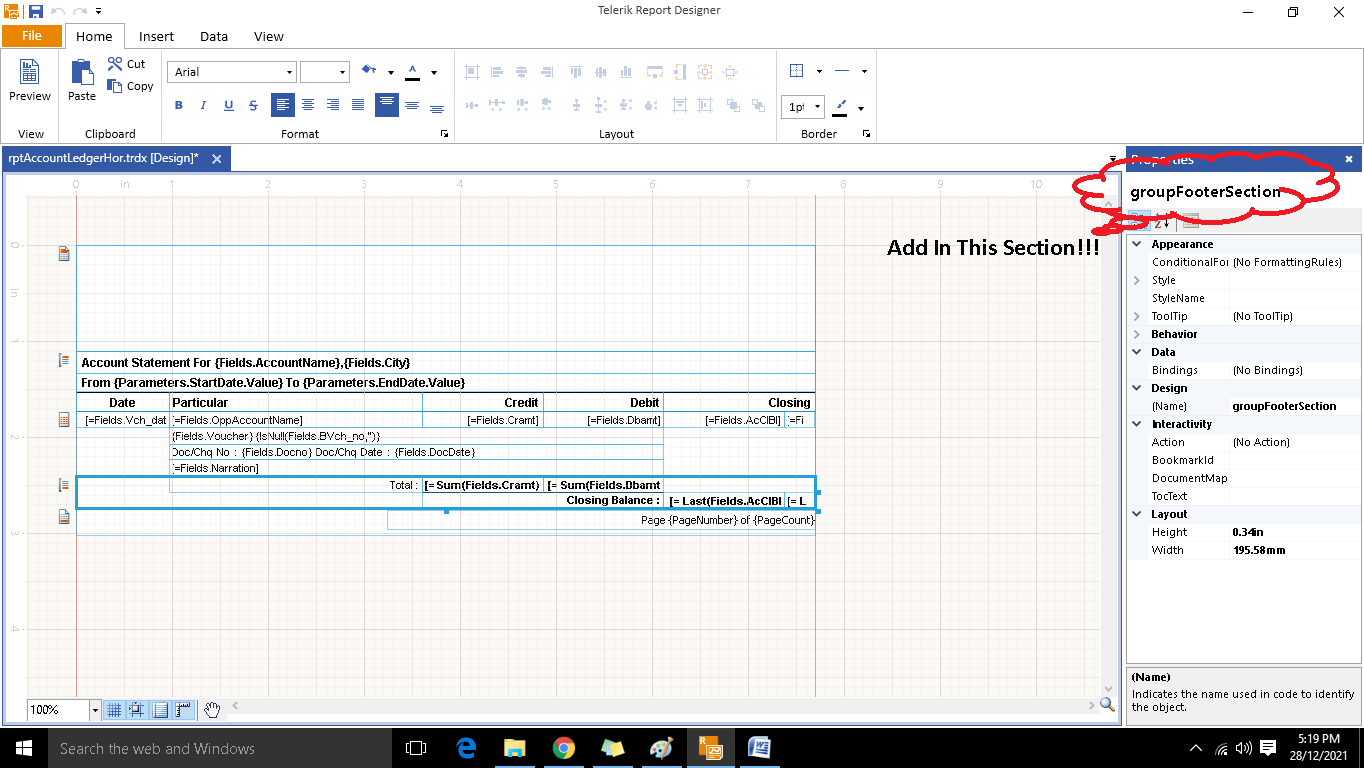
- Enter the footer content (totals, notes, etc.) that should appear after the grouped rows.
- Save the design and use the Print File Preview to verify the grouping layout.
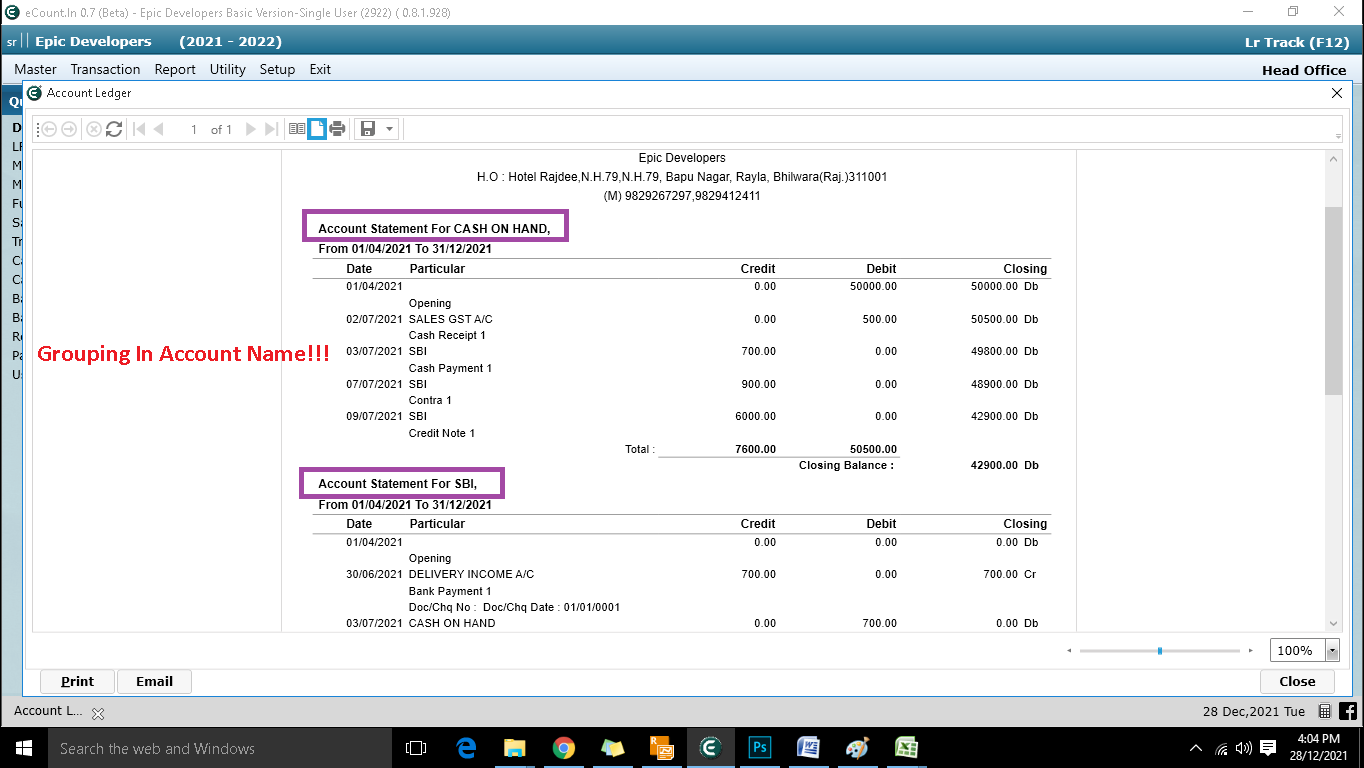
💡 Tip: Keep header and footer sections concise to maintain readability, and use expressions to pull dynamic values.
✅ Summary
- Add a new group to create a
groupHeaderSection. - Define the header content for each group.
- Add a
groupFooterSectionand set its footer details. - Preview the print file to ensure grouping works as expected.