This article explains how to add a UPI ID and QR code to a print file in ecount ERP.
📋 Overview
UPI ID and QR code can be displayed on invoices or other printed documents by configuring the Report Setup and editing the print file.
🔧 Steps / How-to
- Open ecount, go to Setup → Report Setup.
- In the pop‑up window, upload your UPI ID. This value will be extracted from Menu -> Setup -> Company Profile /Report Setup for use in print files.
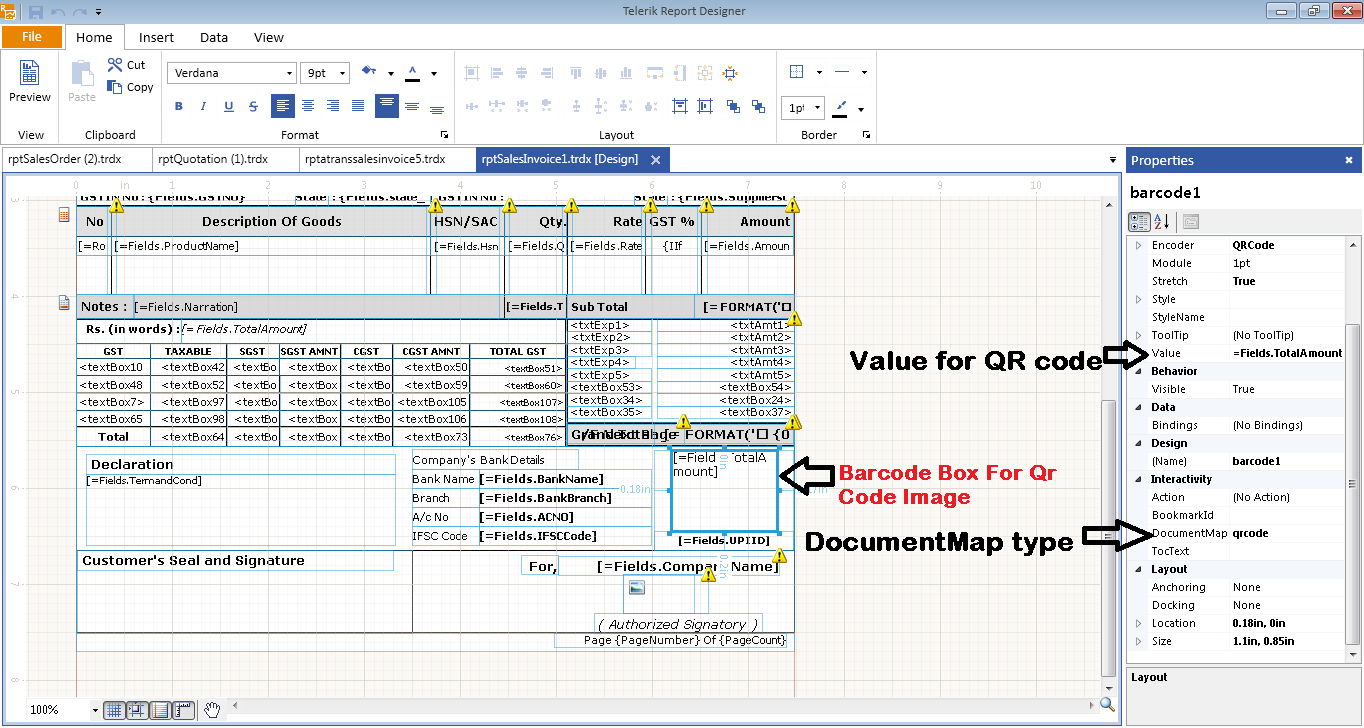
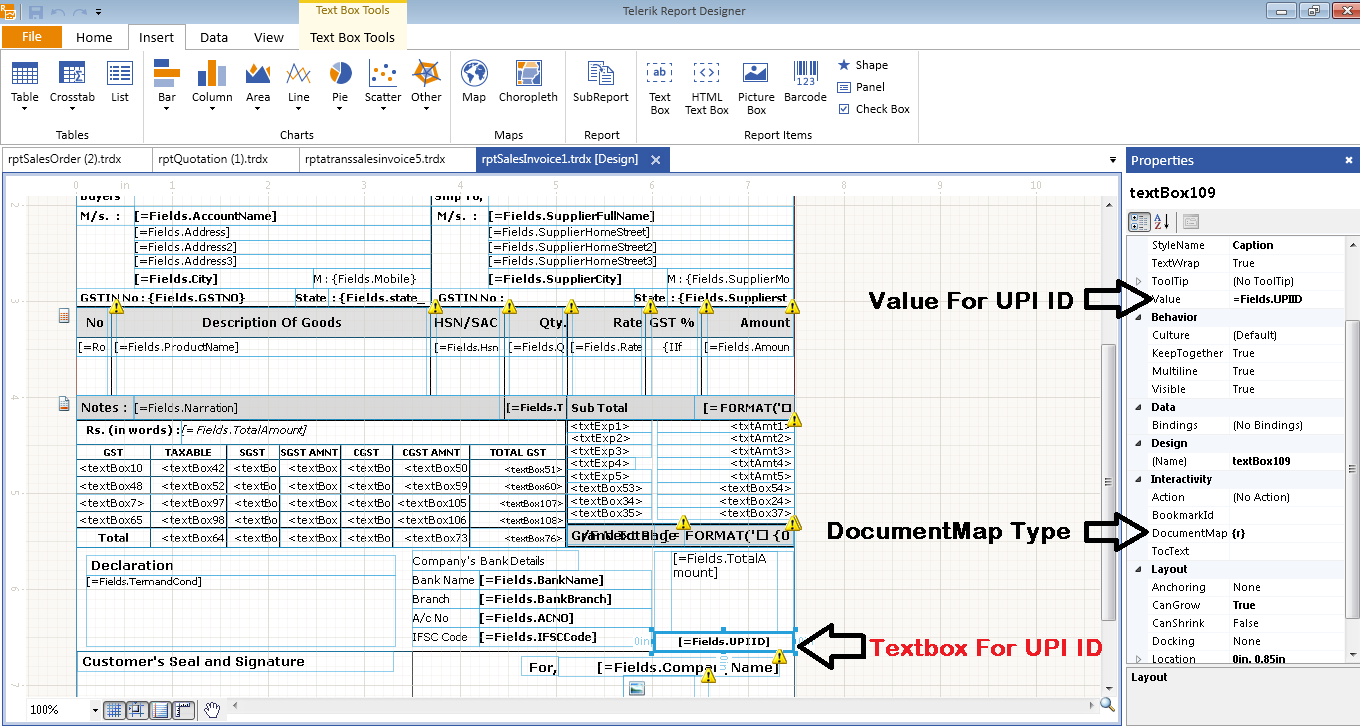
- Open the desired print file, locate the Footer section, and place a Barcode box where you want the UPI ID or QR code to appear.
- In the Barcode box properties:
- Set Value to
Fields.TotalAmountfor the amount field. - Enter your UPI ID in the text box.
- Change DocumentMapType to
rto display the UPI ID. - For a QR code, set DocumentMapType to
qrcode.
- Set Value to
- Save the print file and preview/print to verify that the UPI ID and QR code appear correctly.
💡 Tip: Use the same DocumentMapType setting (r for text, qrcode for QR) consistently across all print files to avoid mismatched displays.
✅ Summary
- Open Setup → Report Setup and upload your UPI ID.
- Add a Barcode box in the print file footer.
- Set DocumentMapType to
rfor UPI ID andqrcodefor QR code. - Save and verify the print output.